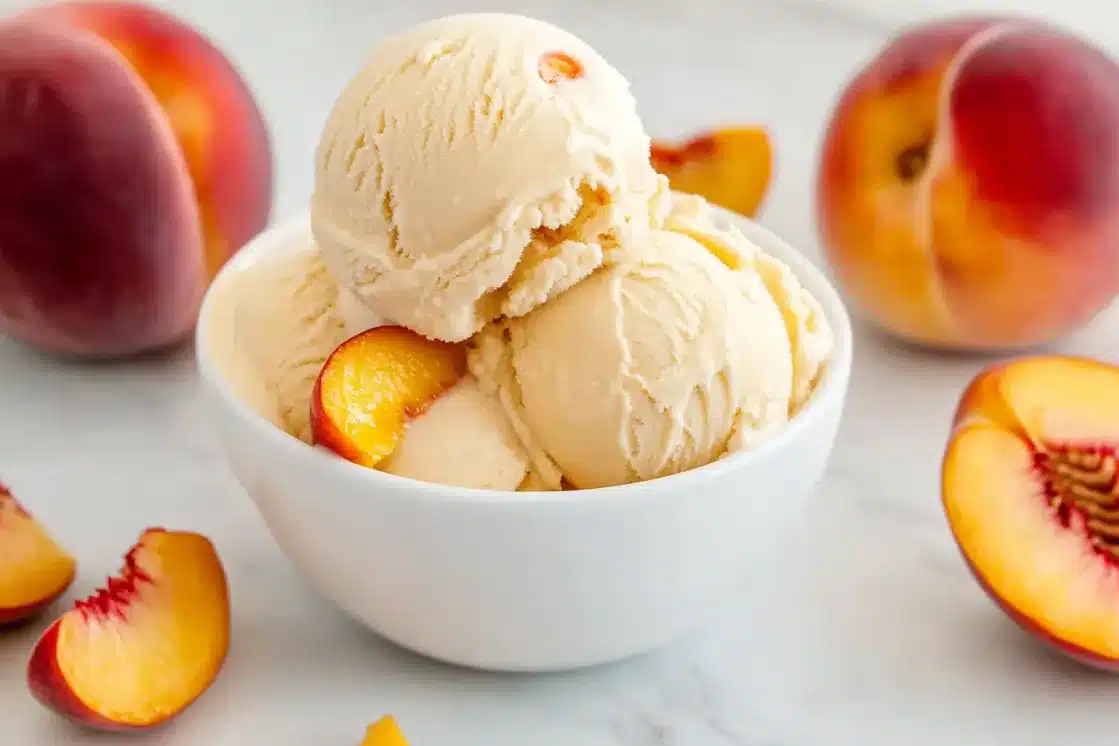
There's an undeniable magic that happens when a spoon of perfectly chilled, creamy homemade peach ice cream melts on your tongue. It's more than just a dessert; it's a sensory journey, a taste of sunshine that instantly transports you to a warm summer day, perhaps even a sun-drenched peach orchard. While store-bought options offer convenience, nothing compares to the vibrant, authentic flavor and silky texture of ice cream crafted with your own hands, especially when it features the star of summer: fresh, ripe peaches.
If you've ever hesitated to make ice cream at home, wondering if the effort is truly worth it, prepare to be convinced. This guide will walk you through creating an easy, incredibly delicious homemade peach ice cream that will have you, your family, and your guests asking for second scoops and wondering why you ever settled for anything less. It's a culinary experience that's both simple and profoundly rewarding, turning fresh ingredients into a bowl of pure summer bliss.
The Unrivaled Magic of Homemade Peach Ice Cream
Why go through the effort of making ice cream from scratch when countless tubs beckon from the freezer aisle? The answer lies in an unparalleled experience that elevates a simple dessert into a cherished memory. Homemade peach ice cream isn't just a treat; it's a statement about appreciating fresh ingredients and savoring authentic flavors.
- Unbeatable Flavor Profile: The natural sweetness and delicate tang of ripe peaches truly shine in a homemade creation. Unlike artificial flavorings, fresh peaches offer a complex, nuanced taste that's simply impossible to replicate. Every bite bursts with genuine fruit essence, far removed from the overly sweet or bland profiles often found in commercial varieties.
- Customization at Your Fingertips: When you craft your own, you are the master of your dessert. Want it a little less sweet? Prefer a richer cream base? Crave an extra hint of vanilla? You have complete control over every ingredient, allowing you to tailor the ice cream precisely to your preferences. This control also extends to dietary needs, making it easier to create healthy homemade peach ice cream if desired by reducing sugar or adjusting dairy.
- Creamy Texture Perfection: Achieving that ideal balance of firm yet yielding, impossibly smooth, and utterly creamy texture is a hallmark of homemade ice cream. With the right technique and ingredients, you can avoid the icy, crystalized disappointments of some store-bought brands, resulting in a scoop that melts luxuriously in your mouth.
- A Nostalgic Experience: There’s a certain nostalgia associated with homemade treats. The aroma filling your kitchen, the anticipation of churning, and the joy of sharing a scoop with loved ones creates an experience that goes beyond mere consumption. It’s about creating moments, celebrating seasons, and making food that feeds the soul.
Selecting and Preparing Your Peaches: The Heart of the Flavor
The secret to incredible easy peach ice cream truly begins with the peaches themselves. Their quality directly impacts the flavor, color, and overall success of your dessert. Think of them as the lead singer in your culinary symphony.
Choosing the Best Peaches
For the most vibrant flavor, seek out fresh, ripe peaches. Here's what to look for:
- Aromatic Fragrance: A truly ripe peach will emit a sweet, pleasant aroma, especially around the stem end.
- Softness to the Touch: Gently press the peach. It should give slightly, but not be mushy. Avoid anything overly hard, as it's not ripe enough, or too soft, which could indicate bruising or overripeness.
- Vibrant Color: While color can vary by variety, generally look for peaches with warm, rich hues. Red blushing isn't always an indicator of ripeness, as it's often due to sun exposure, but a deep yellow or orange background color is a good sign.
If your peaches aren't quite ready, simply let them sit on your counter for a day or two. Patience truly pays off in the flavor department. While fresh peaches are unparalleled, you can also make this recipe with frozen or canned peaches, especially if you want to enjoy this summer treat year-round. For more detailed insights on alternatives, check out our guide on Homemade Peach Ice Cream: Fresh, Frozen, or Canned Peaches?
The Art of Peeling and Macerating
Preparing the peaches is a crucial step that enhances both texture and flavor.
- Peeling: While you can leave the skins on, peeling ensures a silky-smooth ice cream texture without any fibrous bits. The easiest method is blanching:
- Bring a pot of water to a rolling boil.
- Carefully drop peaches into the boiling water for about 60 seconds.
- Using a slotted spoon, immediately transfer them to an ice bath (a bowl of ice water).
- After a minute, the skins should slip off easily. If they don't, your peaches might not be ripe enough, or they need another 15-30 seconds in the hot water.
- Macerating: Once peeled, roughly chop your peaches. Place them in a bowl and sprinkle with about 1/2 cup of sugar (this can be adjusted based on peach sweetness). Stir gently and let them sit for 20-30 minutes. This process, called maceration, draws out the natural juices and intensifies the peach flavor, creating a delightful syrupy base for your ice cream.
Crafting the Creamy Base: Simplicity Meets Indulgence
The creamy base is the canvas for your peach masterpiece. While some recipes call for a simple no-cook base, a custard base (which includes eggs) offers a richer, more luxurious texture and helps prevent ice crystals. Don't be intimidated by eggs; the tempering process is straightforward.
Essential Ingredients for a Classic Base
A typical base for homemade peach ice cream involves:
- Heavy Cream and Whole Milk: The combination provides richness and a balanced texture. The higher fat content of heavy cream contributes to the desirable creaminess.
- Sugar: Balances the tartness of the peaches and adds sweetness. Adjust to your preference.
- Egg Yolks: If making a custard base, yolks act as an emulsifier, lending incredible richness and preventing ice crystals. Ensure they are at room temperature for easier tempering.
- Vanilla Extract: A crucial supporting flavor that enhances and rounds out the peach essence. Don't skip it!
- A Pinch of Salt: Essential for brightening and balancing all the flavors.
Tempering Eggs for Silky Smoothness
If your recipe includes eggs, tempering them is vital to avoid scrambled egg bits in your ice cream. It simply means gradually raising the temperature of the eggs without cooking them instantly.
- In a saucepan, gently heat your milk, cream, and a portion of the sugar until it's steaming but not boiling.
- In a separate bowl, whisk your egg yolks and remaining sugar until pale and creamy.
- Slowly, and while continuously whisking the egg yolks, pour about 1/3 cup of the hot milk mixture into the egg yolks. This gently warms the eggs.
- Repeat this process twice more, adding hot milk to the eggs in small increments, whisking constantly. You should have incorporated about 1 cup of the hot milk mixture into the eggs.
- Now, pour the warmed egg mixture back into the saucepan with the remaining hot milk and cream.
- Cook over medium-low heat, stirring constantly with a wooden spoon or spatula, until the mixture thickens enough to coat the back of the spoon. Do not boil.
- Remove from heat, stir in vanilla extract, and immediately strain the mixture through a fine-mesh sieve into a clean bowl. This catches any tiny cooked egg bits for an ultimately smooth base.
The All-Important Chill
Whether your base is a cooked custard or a simpler no-cook version, chilling is non-negotiable. The ice cream base *must* be thoroughly chilled in the refrigerator for at least 4 hours, or ideally overnight, before churning. This allows the fat molecules to firm up, contributing to a creamier texture, and ensures the mixture is cold enough for your ice cream maker to churn efficiently without melting too quickly.
Churning Your Way to Perfection: Tips for Success
Once your base is perfectly chilled, it's time for the exciting part: churning!
The Churning Process
Follow your ice cream maker's instructions carefully. Most machines involve pouring the chilled base into the frozen bowl and letting it churn for 20-30 minutes. During this process, air is incorporated, and the mixture freezes, gradually thickening. Add your macerated peaches during the last 5-10 minutes of churning, allowing them to integrate evenly.
When finished, your homemade peach ice cream will likely have a soft-serve consistency. It will be delicious, but for a firmer scoop, it needs more time in the freezer.
Post-Churn Hardening and Storage
- Transfer: Scoop the soft ice cream into a freezer-safe container.
- Prevent Ice Crystals: To minimize ice crystals, press a piece of parchment paper or plastic wrap directly onto the surface of the ice cream before securing the lid.
- Harden: Freeze for at least 4-6 hours, or preferably overnight, to achieve a firm, scoopable consistency.
- Serve and Enjoy: When ready to serve, let the ice cream sit at room temperature for 5-10 minutes to soften slightly for easier scooping.
Customization and Creative Twists
The beauty of making your own homemade peach ice cream is the endless possibilities for customization.
- Enriching with Condensed Milk: For an even richer, denser result, you can replace a portion of the milk and sugar with one can of sweetened condensed milk. This also simplifies the process for those looking for a no-churn or easier base.
- Healthier Alternatives: If you're aiming for healthy homemade peach ice cream, reduce the granulated sugar by half and consider adding a touch of natural sweetener like honey or maple syrup to taste. The natural sweetness of ripe peaches often means you need less added sugar than you might think.
- Flavor Boosters: A tiny splash of almond extract beautifully complements peach. A hint of fresh lemon zest can brighten the flavor, or a pinch of cinnamon or cardamom can add a warm, comforting note.
- Serving Suggestions: While heavenly on its own, your fresh peach ice cream is also fantastic alongside a warm peach cobbler, spooned over waffles or pancakes, or even blended into a summer milkshake.
From the first delightful scoop to the last creamy bite, making homemade peach ice cream is an experience that truly encapsulates the joy of summer. It’s simple, rewarding, and yields a dessert that far surpasses anything you can buy. So, gather your ripe peaches, dust off your ice cream maker, and prepare to create a fresh, creamy masterpiece that will be the highlight of any warm-weather day. Dive in, experiment, and savor the sweet success of your own summer bliss in a bowl.
